

My husband, Tyler, has worked as a stained glass artist for over a decade now. It's actually how we met – funny story. It was 2002, my cousins had both left for college and my Aunt was a little worse for wear with both of her children gone. My mom, wanting to keep her sister's idle hands busy, decided they should take a class. She invited me along. After signing up at a local studio, a really long, twisted and fateful string of events led us to a different studio, right across the tracks from where I was working. Tyler was our teacher and the rest, as they say, is history.

It's a beautiful and amazing art form and seeing what goes into designing, engineering, building and installing these windows, makes you appreciate it even more. In case you're wondering, all the pics in this post were taken by me of projects Tyler has worked on. Much of the work his studio has done is restoration of very old church windows, but they also design new pieces for churches, synagogues, universities, hospitals and residential homes.


It's been exciting for me to get the chance to learn about this art form from such experts. It's something I've always admired but probably would have never had the chance to fully immerse myself in had I not met Tyler. I've had the privilege to help with various projects over the years and to build some pieces of my own for our house. As some of you may know, the studio where Tyler works is closing soon. We spent several months considering options for taking it over but in the end, we sadly decided it wasn't the right decision.
So before the racks clear out and the doors close for good, Tyler and I are building a couple more windows for ourselves and I thought it might be interesting for you to see the process step by step. While the window I'm building is small and simple compared to some, I'm going to share my adventure of creating it from start to finish.

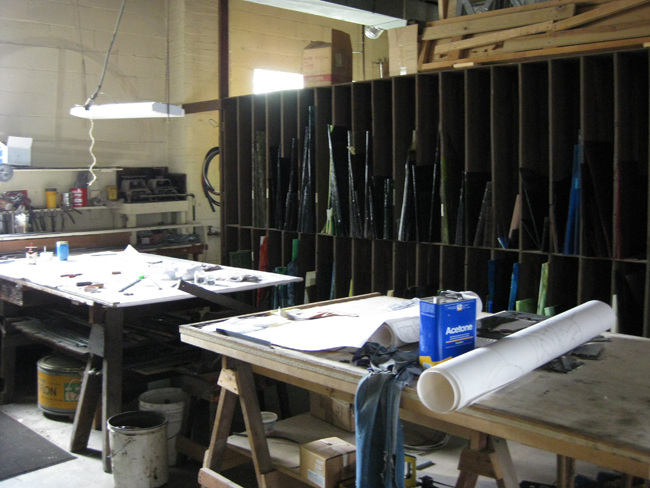
What I love about being at the studio is that it's so different than being in my own studio. It's big, it's dirty, it's usually a total mess and there isn't a computer in sight. Even the cash register is older than my grandma. There are racks of glass and crates of lead stacked everywhere but you feel like such a renaissance man when you're working there, as the only thing different about the craft these days compared to it's beginning thousands of years ago is having the ability to plug in your soldering iron and listen to the radio.

So, shall we get started? The first step in creating a window is designing a pattern. The hardest part about this is understanding the limitations of working with glass. Not everything you draw can be recreated in a window, you have to consider engineering and understand the nature of glass. Certain cuts will cause weak points or breaks and certain cuts just aren't possible. You need the lines to connect and large areas need to be broken up into smaller pieces. That being said, you can still create your initial sketch to your ideal vision and then modify it as needed when you create the full sized drawing. For my window, I decided on a simple waterlily design, surprised? Didn't think so.

Once your initial sketch is ready, you begin the full sized layout, called a cartoon. This window will be about 13" x 40" when done. I first sketched out the drawing to match my original design and then began modifying to be 'glass appropriate'. Take for example the blade of grass shown above. It would not work as it is drawn in the upper right block, the sharp curve in the glass would create a weak spot that would break or give over time, plus it's a very hard cut to make. The bottom left block shows one option for modifying it, but it felt too claw like for me, so with a few more adjustments, I decided on the final design shown in the bottom right. Notice how the end of the grass blade continues down to touch the one below it, and how that piece continues off to the side. That's an example of how you break up large areas.

Once the full cartoon was sketched in, I had a couple more spots to modify, mainly the lilypads. Though I love the simplicity of them in the initial sketch, they had to be broken up into smaller pieces. I first tried more of a typical leaf vein pattern, but it just wasn't right, and I was very happy when I finally came to draw the more curved veins which stem out from the center that you see above. I think they maintain the shape and feel of the pad without detracting from their simple beauty too much.

When the full sized cartoon is complete, the next step is to transfer it to pattern paper, which is a thicker stock that you use to cut the pieces of glass. Some people layer carbon paper between the two sheets to transfer the design, but you can also trace using a light table. You first grid out your outside lines using a straight edge then trace in your drawing, keeping it clean and precise, and making any final modifications as needed.

Before you cut out your pattern pieces, you need to number both the cartoon and the pattern. Imagine having a bunch of little cut outs laying around and trying to piece them back together, talk about a puzzle! You first number your cartoon and then lay the pattern paper back down, writing in the numbers to match. My window only has 147 pieces, but a floral entry door Tyler recently created had over 1000. Yeah, this art form takes a lot of patience.

The next step is to cut up your pattern using pattern shears, which are different than normal scissors. Building a window has to be an exact science, as you often have a precut hole or frame that it needs to fit in. You draw your design to the exact finished size, but when you build the window, you have to account for the width of the lead that will go in between each piece of glass. If you cut the pattern without taking this into account, your window would grow in size and not fit into it's frame. As you can see in the photos above, the pattern shears have a single blade which cuts up into two parallel blades. This removes a small strip of paper from your pattern with each cut, allowing for the size of the lead. Ingenious, isn't it?

There are different sizes of lead that can be used when creating a window, so there are also different sizes of pattern shears, which remove larger or smaller amounts of pattern paper as you go. I will be using 1/8" lead on this window, which is the smallest. I like the look of the thin lead lines, especially with a design such as mine that has small details, you would lose them will bigger lead, which would cover the small pieces of glass when built.
Backing up just a bit, after you trace your cartoon onto the pattern paper and remove it to begin cutting, you lay a thick piece of clear glass on top of your original cartoon. This then acts as your guide for laying out the cut pieces of glass and eventually building the final window. You lay the cut pattern pieces on top as you go and once complete, you are ready to start cutting glass, which I will cover next time in part 2, so stay tuned!


13 comments:
i never even knew about those awesome scissors! how ingenious. boy this is probably my favorite of all your posts...i can't wait for the next installment! :)
i agree. this is a fascinating post. i grew up going to church in a Basilica with some of the most amazing stained glass, so i have a soft spot in my heart for these beautiful windows.
Fascinating -- thank you so much for sharing the steps of this process.
I'm so excited for the next installment! And how do they paint the angel's face? is it just painted or is it melted glass in different colours?
All of the windows in this post are painted by hand and then fired to hold the paint. Gorgeous, aren't they?
i was wondering the same thing about the faces. :)
Fascinating! I can't wait to see how it turns out.
Love this Nicole. Truly beautiful in every way.
Nicole, I have been reading this with joy & can't wait for the next step. I didn't know about the existance of those super scissors.
Your design is divine but that I told you already so it's old news...
Love this post series. My husband has been wanting to get into stained glass as a hobby. This will be very educational for the both of us. Can't wait for the next installment.
Charmaine
very interesting to read. Thank you. I love stained glass windows. We're going to York in the UK this summer and I'm taking my boys to the York Minster to see the stained glass windows. I used to love going there and looking at them with the sun streaming though when I was a child.
Thank you for this very interesting blog post! I love stained glass windows, probably from my years of growing up in the church, LOL and I have some simple stained glass decorations in my home. I look forward to your next instalment. :)
Very well written and very informative. Sorry to hear that the studio is closing. The economy has been hard of many studios.
Laura Goff Parham
State of the Art, Inc
Stained Glass Studio
http://www.sotaglass.com/
Post a Comment