Tuesday, June 29, 2010

In the Kitchen: Orange Chiffon Pie

Today I had planned on sharing one of the fanciest (and most time consuming) dinner + dessert combos I've made in quite some time. However, yesterdays purging bin got the best of me and I fell way behind on all the 'real work' I was supposed to do, and since a three-part recipe post usually takes me a few hours to whip out, it's gonna have to wait 'til next week.


Ultimately though, it all works out, but I realized that the Chocolate Crusted Orange Chiffon Pie I've been waiting to share would be another perfect Fourth of July picnic addition, so here it is. Light yet rich, creamy and delicious, the flavor of this pie comes from real fruit, no jell-o mixes here, and you can taste the freshness in every bite.

Now if you've never made a true chiffon pie before, I'll tell you, it's not all that difficult, but it does require that you have your wits about you and that you be around to keep an eye on things for awhile. It's also not an exact science, but one that you'll come to perfect by instinct the more you do it.

Crust:
2 cups chocolate crumbs
2 tablespoons sugar
pinch of salt
1/2 cup (1 stick) unsalted butter, melted

Filling:
1 Tbsp (1 1/4 envelopes) unflavored gelatin
3/4 cup fresh orange juice (~ 2 large oranges)
2 Tbsp fresh lemon juice (~ 1 lemon)
3/4 cup sugar
4 egg yolks (save the whites for an omelette!)
2 Tbsp grated orange zest
1/4 tsp salt
1 cup milk
1 1/2 cups heavy whipping cream


You can use just about any type of un-iced and un-filled cookie to make crumbs for your crust. Any flavor of graham crackers work well, as well as gingersnaps, vanilla wafers or even biscotti. You can use a food processor to crush the cookies into fine crumbs or alternatively you can place the cookies in a heavy duty large ziploc bag and crush them with a rolling pin.

To make the crust, mix the crumbs, sugar and salt in a medium bowl. Add the melted butter and stir until well blended and all crumbs are moist. Press the crumbs into the bottom and up the sides of a 9" pie pan, building up just slightly above the rim.

Bake the crust at 325° for 8 minutes and set aside to cool.


I used a larger zester on the oranges for this pie, as I wanted to see some of the zest throughout, but you can also use a microplane zester for a finer grate. Just be sure to zest your oranges before squeezing them.

To prepare the filling, in a medium saucepan, sprinkle the gelatin over the orange and lemon juice. Stir with a fork and let stand for a few minutes to soften the gelatin.


Add the sugar, egg yolks, orange zest and salt and whisk until blended. Then whisk in the milk.

Cook over medium heat, whisking almost constantly, for about 5-10 minutes until the mixture starts to become foamy around the edges. Cook for another 5-10 minutes until it has thickened slightly and you start to see wisps of steam rising, but be sure to not let the mixture boil.

Pour into a large bowl and place in the fridge.


Whisk the mixture every 10 minutes until it feels cool and thickens up significantly. When a lifted spoonful dropped onto the surface makes a small mound and does not sink back in, it's ready. Depending on your fridge and the size of your bowl, this will take 1 – 2 hours, which is longer than most chiffon mixtures.

About 10 minutes before you anticipate the mixture to be thickened, whip the cream with an electric or stand mixer in a medium bowl until stiff peaks form.

Spoon the cream over the orange mixture and gently fold the two together using a flexible spatula until well blended. Spoon the mixture into the prepared crust, mounding in the center, and chill in the fridge for several hours before serving.


If desired, garnish with additional orange zest, mini chocolate chips, shaved chocolate curls or additional whip creamed, serve and enjoy!

At my Memorial Day picnic, I thought the chocolate peanut butter cupcakes would be the temptress but this pie lasted about 3.5 minutes and there wasn't a crumb left. Im sure you can guess what everyone's asked me to make for the Fourth of July…


And find more easy and delicious recipes here.

Wednesday, June 23, 2010

In the Kitchen: Two Fruity Muffins

Am I the only one in total shock that the Fourth of July is less than two weeks away? If I had a dime for every time I've said 'time flies', I could buy the $1500 desk I fell in love with yesterday…

Now I know July 4th is just another Sunday to you international friends, but for us here in the states it's quite a meaningful day. Though really, it's mostly just become a great excuse to have a picnic and play with firecrackers, sparklers and boom sticks — all of which I'm totally on board with, by the way. It happens to be my favorite holiday, because in addition to peanut butter, rocking chairs and kaleidoscopes, fireworks are one of my favorite things.


Oh, and muffins. Did I mention that I love muffins? And cupcakes. I know they are kinda trendy these days but they have always been my favorite. They are just so cute, portable and perfectly proportioned. Nine years ago, everyone I knew ditched me on my birthday so I baked myself some cupcakes. But don't feel sorry for me, it just meant I got to eat them all myself.

You may be starting to wonder why I'm so talkative today, I know I am, and I have no idea, so I'll get back on track! Today I have two delicious muffins for you that are fruity and festive in red, white and blue and are a lighter addition to any holiday picnic (or just great for breakfast or a snack!), whole wheat strawberry banana and blueberry orange buttermilk. Read on for the recipes and printable recipe cards.


Whole Wheat Strawberry Banana

Ingredients:
1 1/4 cup whole wheat pastry flour
1 cup unbleached flour
1 1/2 tsp baking powder
1/4 teaspoon baking soda
1 tsp cinnamon
1/8 teaspoon salt
1 cup fresh strawberries, coarsely chopped
3/4 cup brown sugar
2 large eggs, lightly beaten
1 tsp pure vanilla extract
2 large very ripe bananas
1/2 cup butter, melted and cooled slightly

The key to baking anything with bananas is making sure they are very ripe, and I mean very. When you think they couldn't possibly get any mushier, leave them for another 4 days. The skins should be nearly black and if you see fruit flies starting to buzz around your kitchen, they're ready.

Also, when it comes to the flour in this recipe, if you don't have whole wheat pastry flour or don't like it, you can use 2 1/4 cups unbleached or all purpose flour.


Preheat the oven to 350° and line a 12 cup muffin pan with paper liners or grease and flour cups.

In a large bowl combine the flours, baking powder, baking soda, cinnamon and salt. Gently stir in the strawberries being careful not to smash them but making sure they are coated. Depending on their size, about 6-8 strawberries equals one cup chopped.

In a medium bowl thoroughly mash the bananas. Whisk in the sugar, eggs and vanilla and then add the melted butter.


Add the wet ingredients to the dry ingredients and stir until just combined, careful not to over mix. Batter will be thick. Divide the batter evenly among the tins and bake for 20 minutes at 350° or until a toothpick inserted in the center comes out clean. Cool in tins on a wire rack for 15 minutes before removing and allowing to cool completely.


These muffins rise quite a bit during baking, but always go straight up rather than ballooning over the edges. They also work quite nicely when baked without liners, which I prefer when I'm just baking for myself.


Aside from the pretty, patriotic liners (which I'll get to later in this post), I decorated half my muffins with red, white and blue nonpareils which I sprinkled on top of the batter before baking. I found they looked better on the blueberry muffins because that cake was whiter without any wheat flour, but they were still fun and festive!


· · · · · · · · · · · · · · · · · · · · · · · · · · · · · · · · · · · · · · · · · · · · ·


Blueberry Orange Buttermilk

Ingredients:
1 cup fresh blueberries
2 Tbsp powdered sugar
2 cups unbleached flour
2 tsp baking powder
1/8 tsp salt
3/4 cup light brown sugar
1 large egg, lightly beaten
1 cup buttermilk
2 Tbsp milk
1/4 cup butter, melted
Grated zest of 1/2 large orange

Preheat the oven to 400° and line a 12 cup muffin pan with paper liners or grease and flour cups.


Put the blueberries in a large bowl and add the powdered sugar, tossing gently to coat. Add the flour, baking powder, salt and sugar and mix gently until combined. You can also use frozen blueberries in this recipe, just make sure they are thoroughly thawed, drained and patter dry before tossing with the powdered sugar.

In a separate bowl, mix together the egg, buttermilk, milk, melted butter and orange zest. Add the wet mixture to the dry mixture and fold together just until combined. As a general rule, you never want to overmix muffins or they will become tough.


Divide the batter evenly among the 12 cups and bake for 18-20 minutes until golden and risen. (By the way, and ice cream scoop like this is the *perfect* tool for scooping muffin or cupcake batter. Seriously, it's totally worth the investment and drawer space it will take up.)

Cool in tins on a wire rack for 15 minutes before removing and allowing to cool completely.


The hint of orange in this recipe really brings the flavors to life and adds the slightest orange hue to the batter which is just so pretty. The buttermilk also makes them rich and moist. This recipe really is a delicious twist on a classic favorite.


I also decorated half of these with the nonpareils, which looked awesome. So, speaking of decorations - let's talk liners!


When I bake muffins for my own personal munching, I generally skip the liners. Not only do you have less waste, but I personally feel the muffins are easier to eat (and a little bigger!). But when it comes to a party or sharing muffins with others, I always go with liners, and the more festive the better.


There is an amazing selection on Etsy of all different colors and patterns, I tend to go a little crazy. I order most of mine from Sweet Estelle because her shop is just so darn cute and she is super sweet to boot! I used a combination of stripes and retro swirls at my recent Memorial Day picnic and they looked awesome.


Little Monster Hugs also has a great selection of stars and stripes themed liners that would be perfect for for the Fourth of July!

Now if you don't have time to order liners (or don't want to spend the money), you can also make wrappers out of scrapbook paper or you can customize them for any occasion by printing words or image before cutting them out. It's also fun to make toppers for your muffins or cupcakes and tomorrow I'll have an easy how-to and some templates for you, so I hope you stop back!


Friday, June 18, 2010

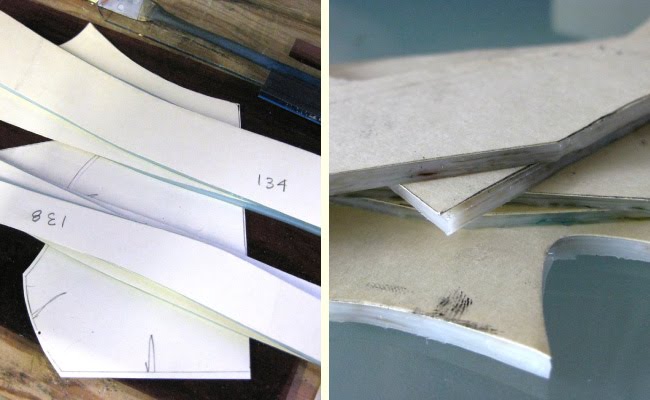
The Art of Stained Glass: Part 2


Today I'm continuing on with part two of my stained glass window building project. In part one I showed you the first steps of creating a window — designing, transferring and cutting out your pattern (check it out here if you missed it!).

Once your pattern is ready, it's time to bring out the glass.


When it comes to selecting glass, there's a variety of choices in color, transparency, texture and pattern. Cathedral glasses are transparent in appearance meaning they will let a lot of light through. Some are machine rolled and some are mouth blown antiques (my favorites). Opalescent glass comes in various densities and color mixtures and as you can guess by it's name, is opaque in appearance allowing less light to show through. You also have to consider how the window will be displayed as all glasses, some more than others, look different depending on the light shining through, or lack thereof.

Above are a few of the glasses I selected for my window, they are all opalescents. The blue is for the water and is smooth in texture and uniform in color. The brighter green is for the lilypads and it has some faint swirling throughout. The darker green is a textured glass and is for the underwater stems.


Here is the glass I chose for the sky. There are many glasses available that are made up of multiple colors, like this sheet, which can create beautiful effects without having to use paints.

I don't feel comfortable handling the big sheets, so I let Tyler do the dirty work :)


Once you select your glass, you layout your pattern pieces on each sheet to decide which area of the glass you will use, what direction you want the grain to go and how much glass you will need. When using a multicolored sheet, this is an especially important step as you want to make sure the colors and patterning flow properly across the finished piece and that you use the area of the glass with the colors you like best. When there is no texture, patterning or direction to a sheet, you simply lay out the pattern pieces to minimize waste.


Now you're ready to cut! The tools are simple, a cutter, pliers and a small jar of kerosene which you can see in the opening photo.


The glass cutter, shown left, has a small carbide steel wheel on one end which is used to score the glass.

The breaking pliers, shown right, are dipped in a liquid rubber product which coats the ends to keep the metal off the glass. These are used to grip small pieces of glass and aid in splitting after a score is made with the cutter.


To cut a piece of glass, what you're actually doing is scoring the glass to create a weak spot for the break to follow. You first dip your cutter in the kerosene to lubricate the wheel. With your pattern piece held firmly in place, you begin your score at one end and trace along the paper pattern going towards your body, finishing by running your score off the edge of the glass. You then use your hands or pliers to break off the piece you scored.

You then continue these steps around each side of the pattern until the piece is cut to shape. For simpler shapes, you can score multiple sides of a pattern piece at once before breaking it out.

And now, for the first time ever on the lillyella blog – live action footage! Hold onto your seat, this one's exciting, but be warned, if you don't like the sound of fingernails on a chalkboard, you might not like this, though Tyler thinks it sounds like frying bacon…


Though this may look like a fairly simple thing to do, it's actually quite the opposite. Aside from trying to follow right to the edge of your pattern piece, depending on the hardness of the glass, you often have to push quite hard to achieve a good score which takes some strength. Tyler can practically do it with his eyes closed, while my shaky hands prove I am a hobbyist at best.


When cutting your pieces, anything less than perfection is unacceptable. And I mean perfection. Your glass needs to match your pattern exactly. Yeah, you can get by with a 1/32 overhang here or there, but that's what separates the men from the boys and a really good window from a bad one. Every little imperfection will affect the final production of the window, how well your pieces line up when building it and how it fits in its frame. The goal is to get it right the first time, but for those of us who aren't quite perfect, meet my friend, the grinder.


For smaller pieces and tiny imperfections, you can use a router type grinder. A diamond coated bit spins and is cooled by water, removing any burs and flared edges.


For large pieces and straight edges, a belt grinder/sander is used. This machine is also cooled by water and has interchangeable belts of different grits. This machine is also used to smooth edges of tabletops, shelves etc.


As pieces are cut, you lay them back in place on top of your original cartoon to double check your colors and glass selections and get ready to start building!

The bottom two photos above are a good example of what I mentioned previously about glass looking different when lit. Notice on the left how the bottom of the waterlily is much lighter than the pad when no light is showing through but how once lit, the pads become much lighter and the waterlily bottom much darker. You'll also see though, that the sky doesn't really look all that much different, it just depends on the specific sheet of glass.


Now all my pieces are cut and I'm ready to start building, which I'll cover in my next and final installment!

Tuesday, June 15, 2010

In the Kitchen: It's Strawberry Season!


For me, nothing says summer like strawberries! Here in Northeast Ohio, they're the first fruit ready for picking and since they aren't available (even in stores) for most of the year, I tend to go a little crazy when I see the juicy red berries come to life.

Aside from my standbys of strawberry lemon marmalade and cheesecake with strawberry sauce, I try to make different treats each year. I'm not always successful with my kitchen endeavors but today I have three delicious recipes to share that I couldn't be happier with – strawberry cupcakes with strawberry cream cheese frosting, strawberry crumble pie and strawberry scones.

My initial pick of about five quarts got me through these three recipes, two failed frosting attempts, a batch of cheesecake sauce and plenty of daily eating. Just in time to head back out and pick the second batch of bloomers. Get your buckets ready and read on for the recipes, how-to's and printable recipe cards. Happy Picking!

· · · · · · · · · · · · · · · · · · · · · · · · · · · · · · · · · · · · · · · · · · · · ·

Strawberry Cupcakes with Cream Cheese Frosting


If you aren't tempted to lick your computer screen right now, you better check your pulse. These cupcakes are like heaven in a little fluted liner. Perfectly moist, soft and fluffy with a zen like balance of fresh and sweet. Plus they're pink, which automatically kicks up the awesomeness a few notches. They're also pretty easy to make, so what are you waiting for?


Ingredients yields about 16 cupcakes
1 1/3 cup unbleached flour
1/4 cup cake flour
1 1/2 tsp baking powder
1/4 tsp salt
1 stick butter, room temperature
1 1/8 cup sugar
3/4 tsp vanilla
2 eggs
1/2 cup milk
1 cup finely chopped fresh strawberries

Frosting
8 oz cream cheese, room temperature
1 stick butter, room temperature
2 cup powdered sugar
1 Tbsp + 1 tsp strawberry puree


Preheat the oven to 350° and line muffin tins with paper liners. I often bake muffins (and some cupcakes) without liners but I find these cupcakes work better in liners.

If you have trouble finding cake flour, look by the cake mixes rather than the bags of flour. It's in a box and looks like a cake mix so it's hard to spot if you haven't seen it before. Pillsbury Softasilk is the most common brand but there are others, too. It does make a difference in this recipe, so do use it.

Sift together the flours, baking powder and salt, set aside.


With an electric mixer (stand or hand), cream together the butter, sugar and vanilla on medium high speed. Add the eggs one at a time and beat until just mixed.

On low speed, beat in half the flour mixture, then half the milk, then the remaining flour and lastly the remaining milk, beating until well mixed. Gently stir in the strawberries by hand.


Spoon batter into prepared liners, filling about 3/4 full. I have one 12-cup muffin pan and two 6-cup muffins pans for recipes that make more than 12 cupcakes. Having the smaller 6-cup tins allows for better baking when you have 3-4 extra cupcakes and having two of them allows for two full 12-cup batches.

Bake for 15 minutes and rotate tins in oven. Bake for another 10 - 15 minutes until the tops are lightly golden and a toothpick inserted in the center comes out clean. Cool the tins on a wire rack for 15 minutes then remove the cupcakes from the tins and allow to cool completely before frosting.


To make the frosting, you'll first need a little strawberry puree. Finely chop about 5 - 8 strawberries (depending on size) and mash them in a bowl with a fork or masher until pureed.

Next, cream together the butter and cream cheese with a electric mixer. Beat in the strawberry puree followed by the powdered sugar, one cup at a time. Beat until well blended and thick. Add additional powdered sugar as needed to taste or for thickness. Do note, this frosting will be a little thinner than a standard cream cheese or buttercream frosting because of the strawberries. Chill it in the refrigerator for 30 - 60 min before piping and it will work nicely.

My piping is a little sloppy because I was impatient (and running out of daylight), so I piped my cupcakes before the frosting chilled enough. It still works just fine and wont run off the cupcakes, but will look much prettier and stay put a bit better if chilled.


All that's left now is to enjoy! If these don't make it into someone's belly the first day, store them in an airtight container in the fridge for up to a week. Allow them to sit for at least 30 minutes (or longer) and warm to room temperature before eating. Trust me on that one, they're too hard when cold but just as good as fresh baked after they warm up, even a week later. Fat chance if they make it past day two.


· · · · · · · · · · · · · · · · · · · · · · · · · · · · · · · · · · · · · · · · · · · · ·

Strawberry Crumble Pie


If pie is more your thing, listen up. Chances are you are used to cold strawberry pies, topped with piles of whipped cream or made chiffon style. And while there's nothing wrong with those classics (trust me, I'll throw back a piece or seven), you don't often see a warm, gooey baked strawberry pie. Topped with a sweet crunchy crumble, sitting atop a chewy cream cheese crust you say? Yes, please.

It's not a very sweet pie, it lets the simple strawberry filling speak for itself, but the crumble topping adds a sweet crunch and the buttery cream cheese crust has the perfect bite. I don't even like fruit pie, let alone warm fruit pie, but I've been on this one like a duck on a slug.


Ingredients
Crust
1 stick butter, slightly softened
3 ounces cream cheese, slightly softened
1 1/4 cups unbleached flour
1/8 tsp salt

Crumble
1/3 cup sugar (I use raw turbinado sugar)
1/2 cup unbleached flour
3/4 cup old fashioned or quick-cook oats
4 Tbsp melted butter, cooled

Filling
5 generous cups quartered strawberries
1/2 cup sugar (if you like a sweeter pie, use 2/3 cup)
2 tsp fresh squeezed lemon juice
2 Tbsp cornstarch
2 Tbsp flour
1/4 tsp grated orange zest


To make the crust, beat together the butter and cream cheese until combined. If you have a food processor, you can make the crust in there, otherwise, you can use a hand mixer and a spoon!

Add the flour and salt and mix until blended. Dough will start to come together but still be in pieces. Remove the dough from the bowl and shape into a disk. Wrap in plastic and refrigerate for 45 minutes.


While the dough is chilling, you can make the crumble topping. Combine the sugar, flour and oatmeal in a small bowl, stir until blended. Add the melted butter (cooled slightly) and stir until incorporated. Refrigerate until ready to use.


Back to the dough! Once chilled, remove from the fridge and on a lightly floured surface, roll to about 1/8" thick and large enough to fill a 9" pie pan.


I find the easiest way to transfer dough to a pie dish is to roll it around the rolling pin (add a little flour as you go so it doesn't stick to itself). Hold the rolling pin over the pie dish and unroll over the pan.

Press to fit as needed, trim edges about 1/4 above rim of pan and shape as desired.

Now, I'll tell you, I've never been all that fond of rolling pie dough. It really is a fine art but I do ok after years of practice. However, this dough is a different story. It's soft, it's hard to work with, it will probably tear and make you go crazy. But don't worry! Just smoosh it back together and move on. It won't look pretty, but it doesn't have to. The deliciousness will far outweigh a less than perfect fluted edge and everyone will be so impressed that you even made the dough, they won't care what it looks like.

Place the crust back in the fridge for 15 minutes and preheat the oven to 350°. Once chilled, prick the bottom of the dough with a fork and bake the empty crust for 15-20 minutes until lightly golden. Place on a wire rack to cool while you prepare the filling.


Increase the oven temperature to 375°.

Add the lemon juice and orange zest to the strawberries and toss gently to combine. Next add the sugar, cornstarch and flour, stirring gently until thoroughly mixed.


Spoon the strawberries into the crust and top with the chilled crumble mixture.

Bake for 50 minutes until topping is golden brown and filling starts to bubble. Place on a wire rack and let cool slightly before serving.


As I mentioned earlier, I find this pie best served warm, slightly gooey and syrupy and just cool enough to not burn your mouth. You certainly can eat it cold, which is how I usually like my pie, but I think you lose the sweetness of the strawberries and pick up more of the flour taste in the filling when it's cold.


Store any leftovers in airtight container in the fridge and heat slices in the microwave for about 30 - 45 seconds before serving.

I'll end by simply saying, look at that crust…


· · · · · · · · · · · · · · · · · · · · · · · · · · · · · · · · · · · · · · · · · · · · ·

Whole Wheat Strawberry Scones


Scones – you either like 'em biscuity (like me), like 'em sweet (like my parents) or you don't really know what they are (like my husband). Essentially a scone is a small british quickbread of scottish origin. It was originally round, flat and baked on a griddle but the invention of baking powder took this treat to a new level and the common triangle or wedge shape took popularity to minimize dough wastage.

Most scones in the US these days are sweeter than their foregin counterparts and often topped with icing, but I prefer mine less sweet with a sprinkling of coarse sugar and made with whole wheat flour for extra nutrition. You could equate my recipe below to a slightly sweetened fresh strawberry biscuit and for me, it doesn't get much better than that on a rainy Sunday morning.

Ingredients
1 cup whole wheat flour*
1 cup unbleached flour
1/3 cup sugar
2 tsp baking powder
1/8 tsp salt
6 Tbsp butter, slightly softened
2/3 cup cream
1 1/2 cup fresh strawberries

Topping
1 egg + 1 Tbsp cold water
Coarse sugar

*You can omit the whole wheat flour and use 2 cups total white flour if you prefer.


Preheat the oven to 400°.

Coarsely chop the strawberries and let sit in a colander for about 5 -10 minutes to drain any excess liquid. Toss with about 1 Tbsp sugar and set aside.

Mix flours, sugar, baking powder and salt in a large bowl. Cut the butter into cubes and cut it into the flour mixture using a pastry blender, fork or two knifes until it resembles coarse, pea sized crumbles.

Stir in the strawberries and then add the cream, stirring gently until combined and dough starts to hold together.


Transfer the dough to a lightly floured surface (it will be a little sticky, add a little flour as needed) and shape into a disc about 1" thick. Cut into 6-8 wedges and transfer to a parchment lined baking sheet. Alternatively you can shape the dough into a rectangle, cut two squares and then cut each square in half forming 8 triangle scones.

Bake at 400° for 15 minutes.


In a small bowl, whisk together one egg and one tablespoon of water (alternatively you can use milk). Remove the scones from the oven, brush with the egg wash and generously top with coarse sugar. I use raw turbinado. You can skip this step if you prefer and top with a powdered sugar icing if you like a sweeter treat but I find them perfect with the sparkly, crunchy raw sugar topping.

Return to the oven and bake an additional 5 - 10 minutes until tops start to brown. Mine took an additional 7 minutes. Be careful to not overbake or they will get dry.


Let cool on pan or a wire rack about 10 minutes before munching. I find these most delicious when served fresh out of the oven and slightly warm, topped with a little butter and fresh fruit spread (like homemade peach butter!).

You can store any leftovers in an airtight container in the fridge for a few days and allow them to warm to room temperature or pop them in the microwave for a few seconds before enjoying.

You can also substitute a variety of fresh fruit for the strawberries in this recipe, such as blueberries, raspberries or peaches - yum!


I hope you've enjoyed today's strawberry celebration! I'd love to hear what you think if you give these recipes a try and I'd also love to see you're favorite strawberry recipes. Feel free to share in the comments below and happy picking!